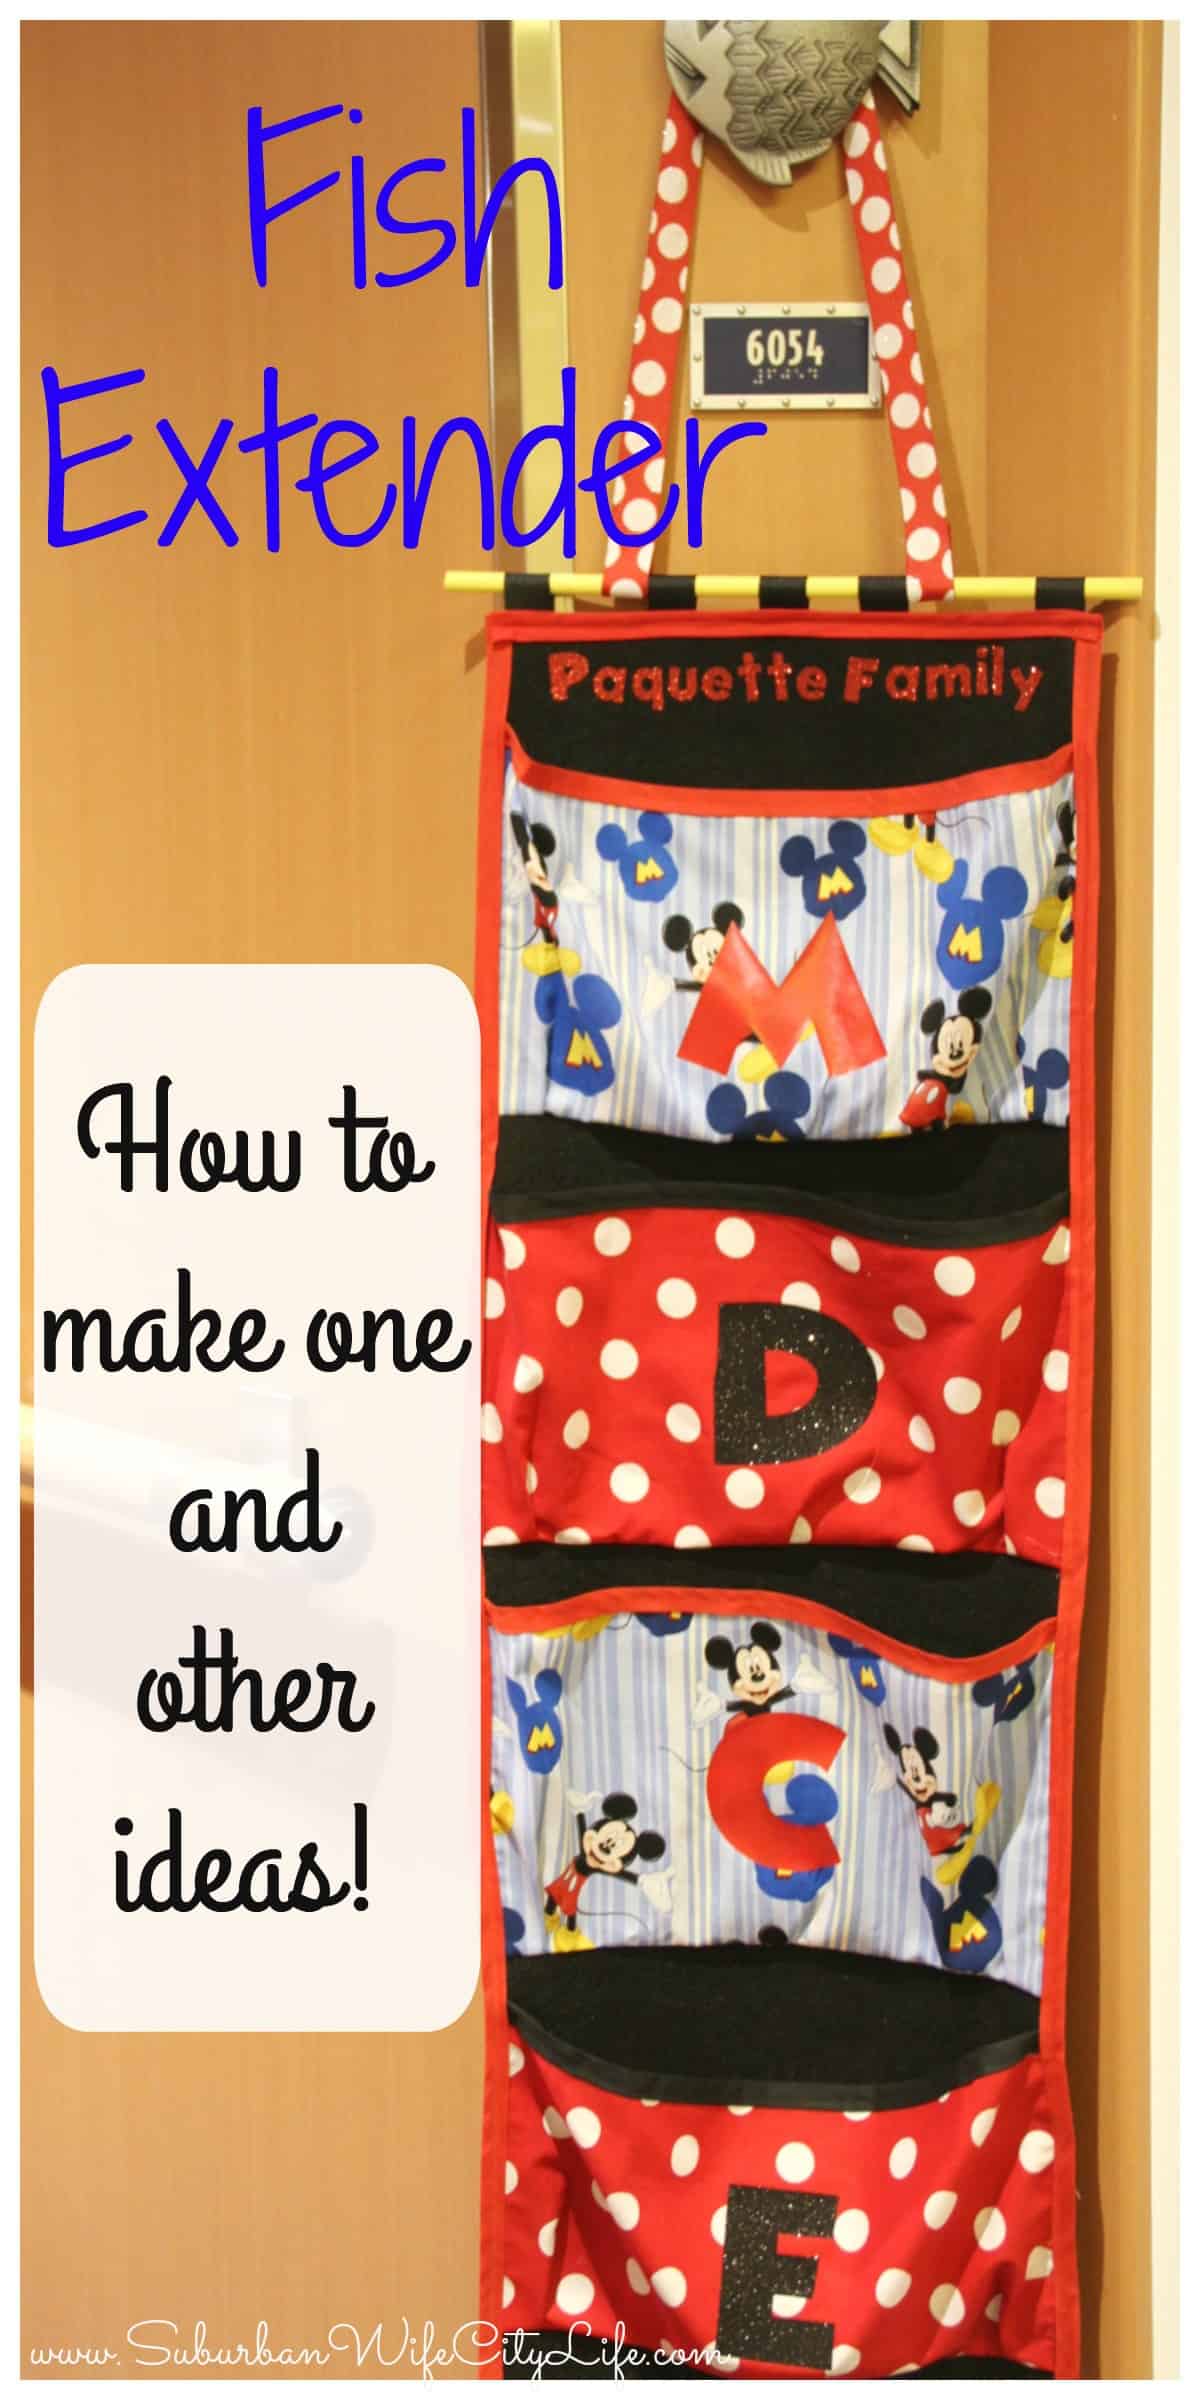
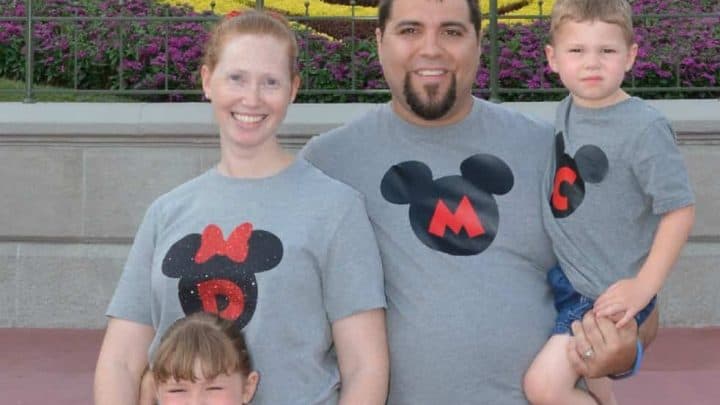
Have you ever gone on a Disney Cruise or are you planning to go on one? When we recently attended a conference for Disney Land and Sea I learned quickly how many amazing and fun things there are to do at sea. Of course this is optional, but I wanted to experience as much as possible so I decided to participate in what is called a Fish Extender and I’m going to share with you what it is and a DIY for how to make your own Fish Extender using simple sewing skills.
 What’s a fish extender?
This was the question I asked when someone asked me if I was participating. It’s become a thing on Disney Cruises because on the outside of your door there’s a fish knob. It’s there for papers and information to be left from the cruise, but someone got the idea to hang a bag, or travel extender and coordinate with other families to be left little gifts like a Secret Santa.
Since this is not run by Disney Cruise lines it’s usually organized in a facebook group or on DIS boards. I know our group was Disney Wonder and then the dates we were traveling. That’s where I found someone was organizing a group. Now my group consisted of 10 families total and we said our names, kids ages and if they were girls or boys and what characters we liked along with our room number.
Because I was going with other bloggers we had a lot of people who were eager to participate and all had great ideas for both fish extenders and gifts. I’m sharing how I made my extender for 4 pockets and how it’s simple and easy with a few basic sewing skills.

Fish Extender Supplies Needed:
- Felt -1/4 yard
- Fabric – 1/4 if using 2 kinds of fabric or 1/2 yard if using one kind
- Double Bias Tape – 2 packages (I did Red and Black)
- Ribbon (I used black and red and white polka dot)
- Dowel Rod – 13 inches long (I painted mine yellow)
- Iron on vinyl
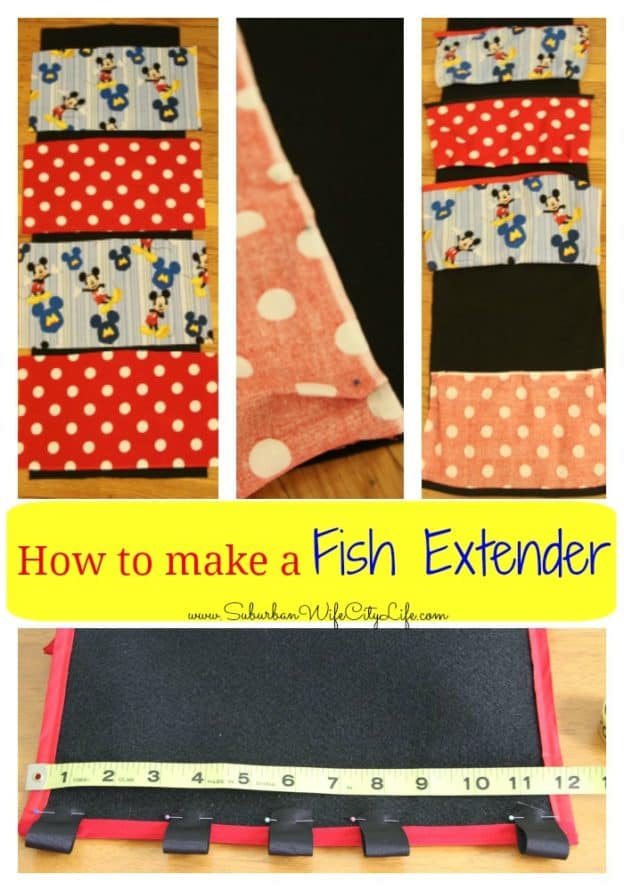
How to make a DIY Fish Extender:
- I was using a scrap of black felt I had so I cut it to measure 36 inches x 12 inches wide
- Next I cut my pockets. I made them 8 inches x 14 inches wide. They’re a little wider because you want to make pleats so things will fit easily in the pockets
- I measured about 2 inches in and then ironed my inch pleat from both sides
- Place the fabric face down on the black felt and pin the bottom of the pocket where you want it for all the pockets
- Once you have them in place sew the bottom of the pocket to the felt
- Use the double bias tape on the top of each pocket
- Sew the pocket sides to the felt
- Then take the double bias tape and go around the outside of the entire fish extender
- Cut ribbon 3 inches long (I did 4 ribbons)
- Fold the ribbon in half and pin to the back of the fish extender. I spaced mine out planning for 6
- Sew the ribbon on the back
- Add the dowel rod through the ribbon
- Add 2 long ribbons around the dowel rod. This will be what you use to hang from the fish on the boat
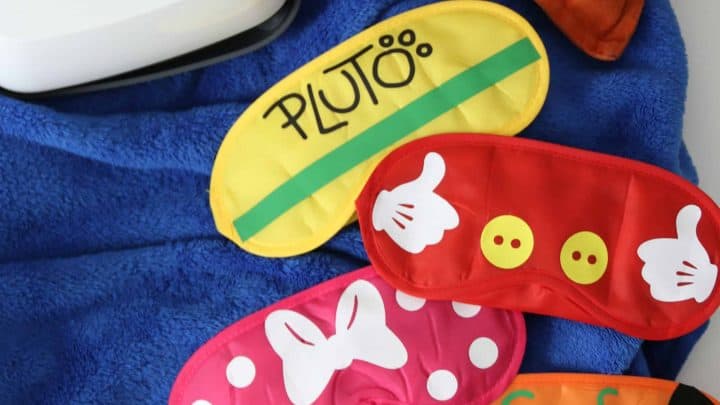
- If you want to add names or letters you can. I used my Cricut to cut our iron on vinyl and added our first initial to the pocket and our name on the top.
 It’s a lot of steps, but it’s pretty easy to make if you can sew a straight line and measure. I loved our fish extender and was so happy I participated in the activity. It was actually the kids favorite part of the cruise looking to see what they were left. I also love that I can reuse this the next time we go on a Disney Cruise!
More Disney DIY Cricut Projects


I’ve also got some amazing friends who have other fish extender DIY ideas so if sewing isn’t your thing check these out!
Kami from The Momma Diaries Fish Extender

Dawn from A New Dawnn Fish Extender

Have you ever been on a Disney Cruise and participated in fish extenders?
Make sure you also check out my Disney Cruise post:

 Fish Extender Gift Idea: Travel Treasures
 This is me Destiny! I'm a content creator that covers DIY, Cricut, Travel, National Parks, Disney, Games and Family. I’m navigating life with my husband Mike, 2 kids and live in the suburbs of Maplewood, New Jersey.
I love it! So handy too 🙂 Thanks for showing me how to make it.
Glad you like it and thanks for stopping in.
Just made ours. It was amazingly more simple than I thought.
Thank you so much for sharing the instructions.
This is so great to hear. I bet it looks awesome!
I don’t understand step 4. What do you mean by “pit” the pocket? Also confusing me is placing the fabric face-down on the felt. I saw no step that mentioned turning the pocket out, which I surely would want to do since I’m sewing it face down to the felt
Sorry about that. It should say pin the pocket on the bottom. So you’ll place the fabric face down and then only sew the bottom of the pocket, then flip it up and sew the sides on the right side of the fabric. I hope this helps.