
Since Cricut launched its Cricut Infusible Ink I’ve been thinking of lots of different ways it can be used and testing it out. Now I’m sharing How to use Cricut Infusible Ink. Plus how easy it is to have personalization and professional quality in your project. I also came up with a way to share my vacation memories!
Cricut Infusible Ink
When Cricut made the announcement about Infusible Ink I knew it would be a game changer for at home crafters. There are 2 different ways to use Infusible Ink. There’s the Cricut Infusible Ink Transfer sheets and Infusible Ink Pens and Markers. I’m going to share step by step how easy it is to use both!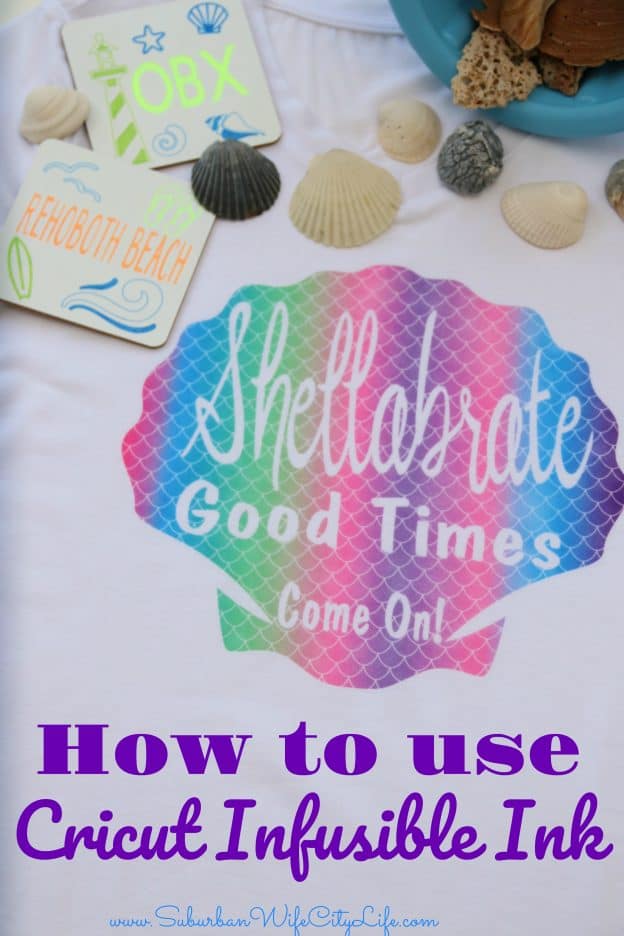
How to use Infusible Ink
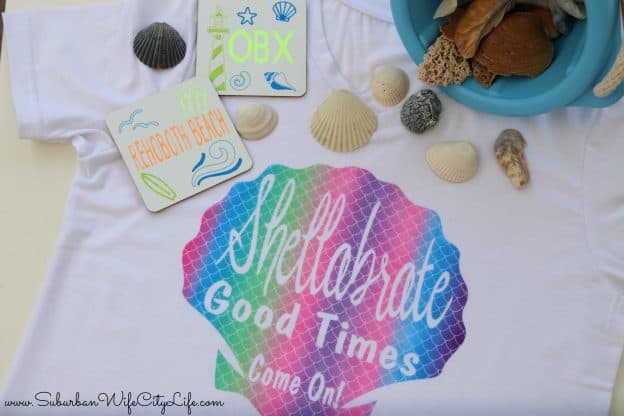 When it comes to working with Infusible Ink there are a few steps, but I’ve got it all broken down for you. Having just returned from a beach vacation I wanted to relish in the fun and memories we were making as a family, from picking up seashells on the beach to watching my daughter learn how to surf. Making shirts, coasters and bags that mean something to me and my family are one of the things I love about have a Cricut.
Supplies Needed:
Cricut (Maker or Explore)
Cricut Infusible Ink transfer sheets (Available at Michael’s exclusively)
Cricut Infusible Ink compatible blank shirt (Available at Michael’s exclusively)
Butcher Paper
Lint roller
EasyPress 2
EasyPress Mat
Cardstock
How to make a shirt with Infusible Ink
- Use Cricut Design Space to make your project. Here you’ll find my Shellabrate Good Times – Come On! design.

- Place the Infusible Ink transfer sheet on a mat face up. Note: You’ll want to make sure your hands aren’t wet or covered in lotion as it can cause the ink to smudge.
- Once you’re ready to cut the design make sure to select Mirror Image and the material is Infusible Ink Transfer Sheet (remember you can use either a Maker or Explore machine)
- Cut the design
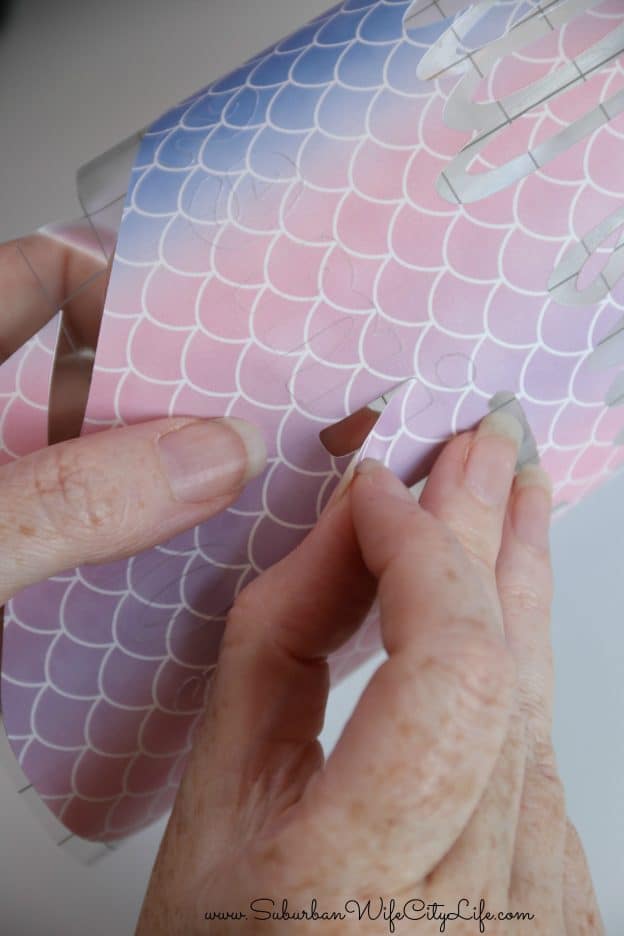
- To weed Infusible Ink Transfer you’ll just want to use your hands, and maybe tweezers. It’s very easy to weed
- Once you’ve weeded it’s time to pull out the EasyPress 2. For shirts I like to use the 10 x 12
- For this shirt I used the Woman’s V neck Cricut blank (remember these shirts are special and will absorb the ink best)
- Heat up the EasyPress 2 to 385 degrees. This is what’s great about the EasyPress 2, it has the capability to go up to 400 degrees and the heat will be evenly distributed which is very important for Infusible Ink.
- Once your EasyPress is ready to go you’ll want to press the blank shirt to pull out all the moisture. Then let it completely cool.

- After it’s cooled add a piece of card stock into the shirt

- The next step is to take a lint roller to the area of the shirt you’ll be using. You want to remove any little bits on the shirt to ensure you’re ink will transfer properly

- Now it’s time to place your image facedown on the shirt
- Place the butcher paper on top of the image (you’ll want to make sure it completely covers the image and area the EasyPress 2 touches)

- It’s now time to put the EasyPress 2 on top and let it sit for 40 seconds. Keep in mind that you should not move the press around. You want to keep it in place and apply light pressure.
- Once it’s done place the EasyPress 2 back in it’s dock and then wait for the shirt to completely cool before removing the image
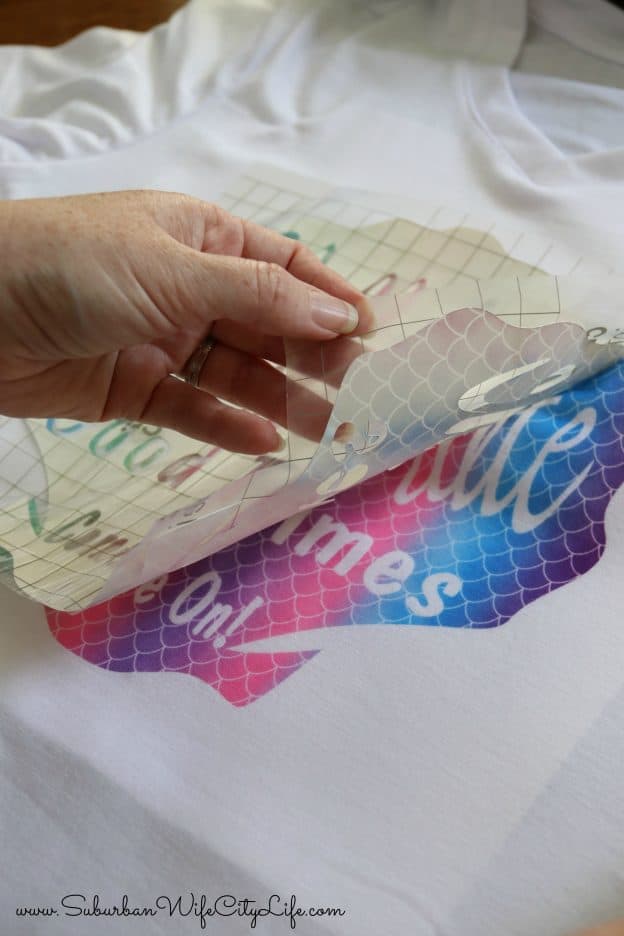
- Here’s come my favorite part! Once the shirt has cooled it’s time to peel back the Infusible Ink and she how awesome your shirt looks.
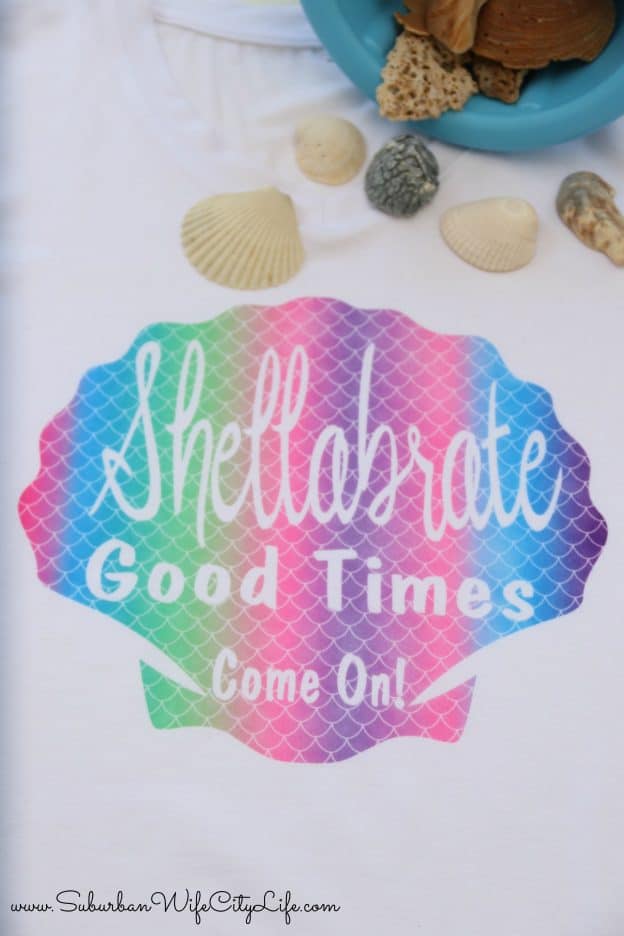 To me it’s crazy how crisp and professional this looks. It’s also so bright and soft and makes me think of our vacations and having fun. I mean Shellabrate Good Times Come On! (I know you’re singing along)
How to use Cricut Infusible Ink Pens
 Speaking of vacations one of the other really cool things you can do and use are the Cricut Infusible Ink pens and laser printer paper. I wanted to make some coasters that remind us of our favorite places we like to vacation. This way when I’m sitting in my living room I can look at this coaster and remember walking up the steps to the lighthouse or watching my daughter catch her 1st way.
Supplies Needed:
Cricut (Maker or Explore)
Cricut Infusible Ink Pens (Available at Michael’s exclusively)
Laser Ink Paper
Cricut Infusible Ink Compatible Blank Coasters (Square or Round) Available at Michael’s exclusively
Cricut Heat Tape
Butcher Paper
EasyPress 2
EasyPress Mat
- The coasters are 3.75 so I designed my images to be 3.5 inches in deisgn space
- When designing make sure you select draw and the Infusible Ink pens (there are 2 sizes 0.4 and 1.0)
- Once you’ve designed it’s time to draw and cut
- Place your laser paper on a lite mat (the blue one)
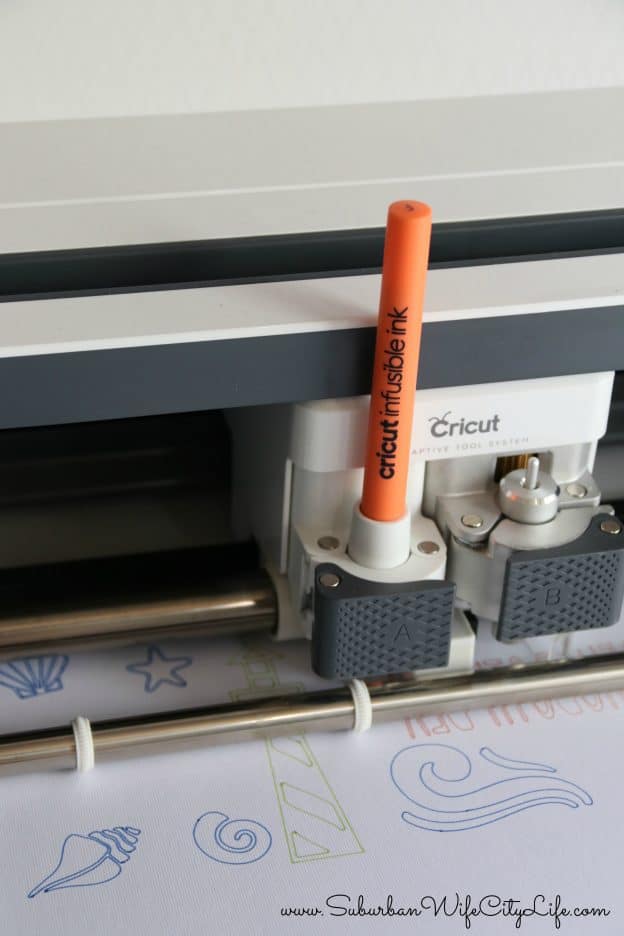
- Make sure you mirror your image and insert the pen you’re prompted with. I love how you hear a little click when the pen is in place.
- After you’ve done all the pens and your square or circle is cut it’s time to see if you want to color in anything.

- Color in anything you want using the Infusible Ink Pens or Markers
- Now it’s time to get your EasyPress 2 warmed up to 400 degrees!

- While it’s warming up take a moment to use a lint free cloth to wipe down the coasters. Remember it’s very important to have a smooth surface for the ink to really get into the coaster
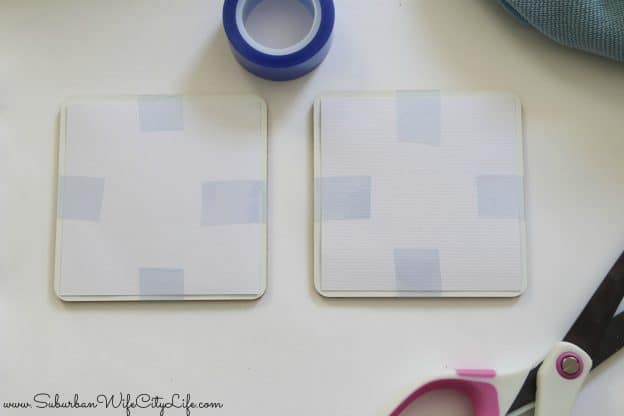
- Place the design paper face down on the white side of the coaster and use the heat resistant tape to tape it into place
- Put your coaster on top of a large piece of cardstock
- Add some butcher paper on top of the coasters
- Use the EasyPress 2 for 40 seconds
- Place the EasyPress 2 in it’s carrier and wait till the coasters have completely cooled before you try to touch them. Seriously they are very hot so just wait for the reveal.

- After they have cooled peel back the cardstock and admire your design
 It’s pretty amazing how the design is embedded onto the coaster. I love how smooth and professional they look. As we take more vacations I’ll be adding more coasters to the collection, and love that I can also include some round ones to mix it up.
Cricut Infusible Ink Steps
 It’s a lot of steps, but they are easy and the result is amazing with these high quality pieces. I feel like this is only the start of the different projects you can create with Cricut and Infusible Ink and I can’t wait to make more things.
Have you tried Infusible Ink?
Make sure you check out my other Cricut Posts:
 DIY Floppy Beach Hat
 How to use Cricut Print then Cut
 Disney Balloon Umbrella
 This is me Destiny! I'm a content creator that covers DIY, Cricut, Travel, National Parks, Disney, Games and Family. I’m navigating life with my husband Mike, 2 kids and live in the suburbs of Maplewood, New Jersey.
Trackbacks/Pingbacks