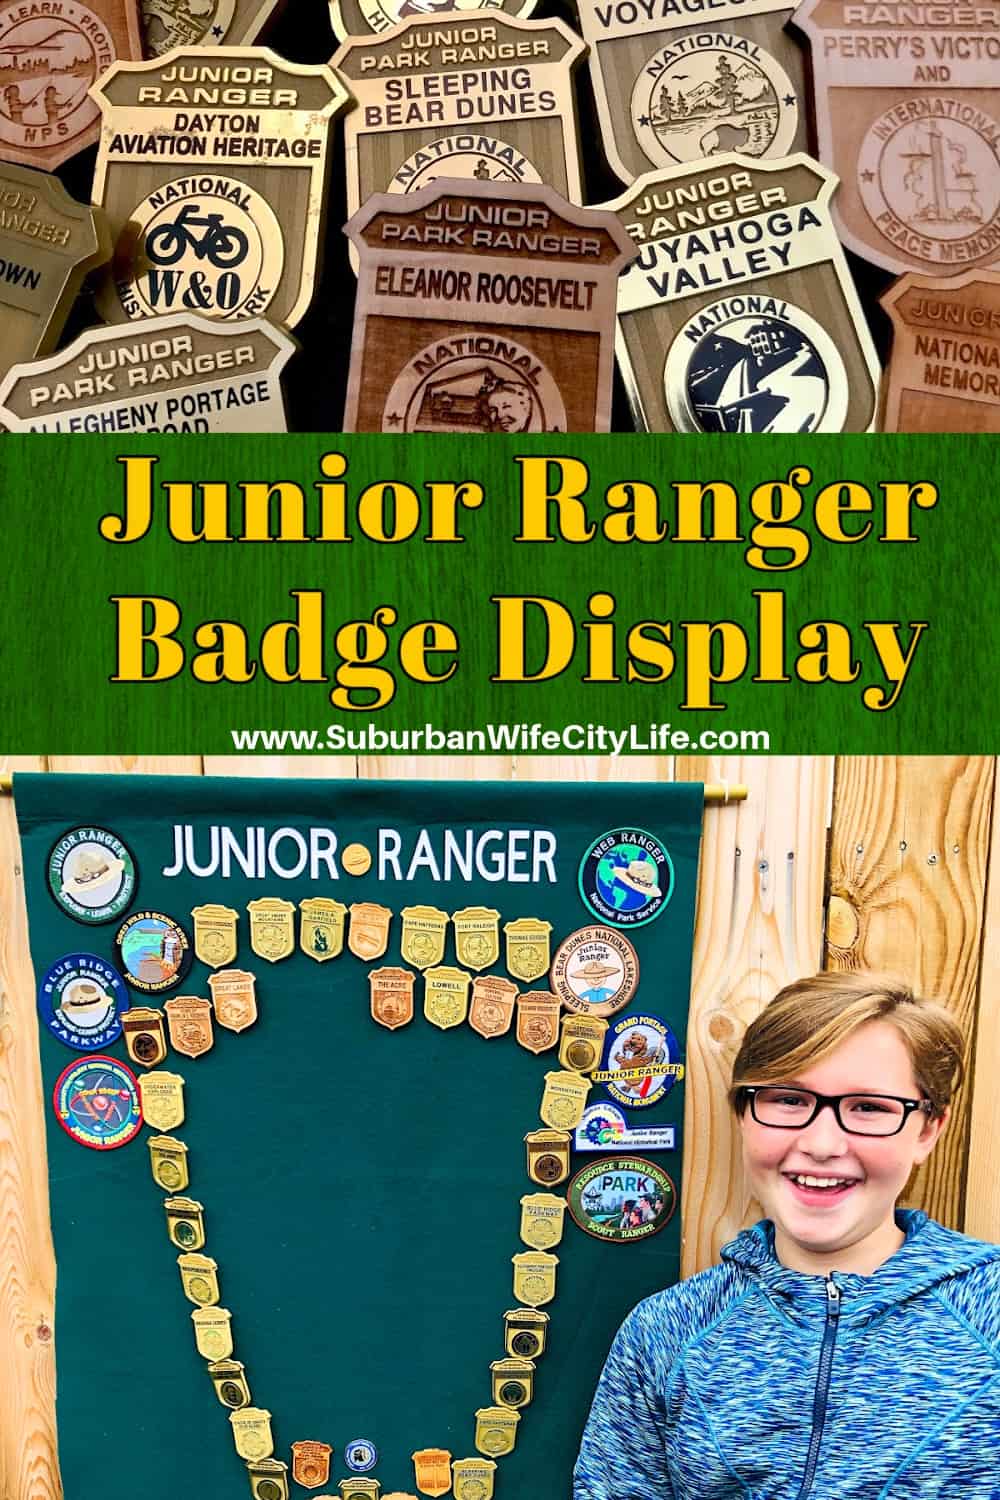
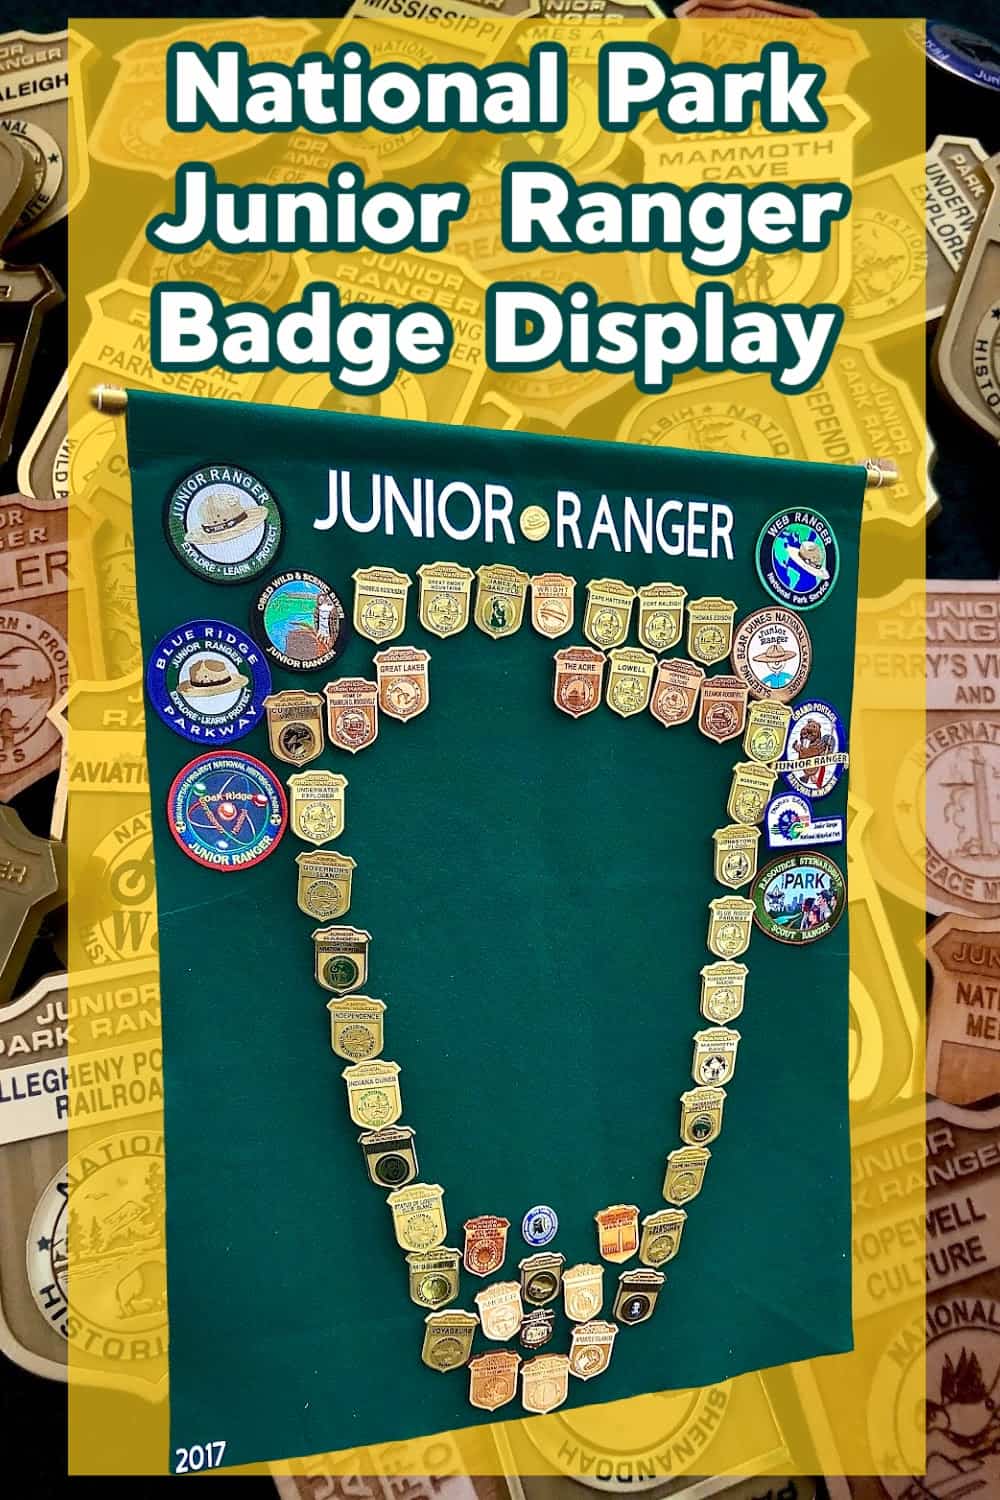
Collecting Junior Ranger Badges while visiting National Parks and Sites is a great way to show all the kids have learned over the years, but why not display them. I’m sharing National Park Junior Ranger Badge Display that’s fun and easy to make.
I’ve talked about about the Junior Ranger Program previously. Check out the Complete List of Junior Ranger Programs with all the programs listed by region plus an interactive map so you can plan a future trip. Don’t forget about the National Parks Passport book.
What is the Junior Ranger Program?
“Explore, Learn, and Protect!” The Junior Ranger motto is recited by children around the country; each taking an oath of their own to protect parks, continue to learn about parks, and share their own ranger story with friends and family.
The NPS Junior Ranger program is an activity based program conducted in almost all parks, and some Junior Ranger programs are national. Many national parks offer young visitors the opportunity to join the National Park Service “family” as Junior Rangers.
How to Earn a Junior Ranger Badge
The first step is to head to the visitor center/gift shop/information booth to find a Park Ranger. Once there ask the Park Ranger if they have any Junior Ranger booklets. The booklets are geared for ages 5-13, but anyone can do it. I like that there are different levels for the booklets. The work you have to complete depends on your age, and it’s different for each place. The booklet can take up to 2 hours to complete in most sites so please schedule that time accordingly. TIP: Many park sites allow you to complete the booklet later if you don’t have the time to complete it while in the park. Once completed send in the booklet to receive the badge. Ask a Park Ranger before you leave to see if they will mail the badges.
Once you’re completed the work you find a Park Ranger and then take the oath to help protect American and it’s Parks. Then the kids are presented with badge specific to the booklet they’ve completed.
Do All National Park Sites Have Junior Ranger Programs?
Many national park sites have a Junior Ranger program but not all. However the list of sites that have Junior Ranger Programs is expanding. Check out the complete list of Junior Ranger programs or look for programs in a certain region.
Junior Ranger Programs in the Northeast
Junior Ranger Programs in the Mid-Atlantic
Junior Ranger Programs in the Southeast
Junior Ranger Programs in the Midwest
Junior Ranger Programs in the Southwest
Junior Ranger Programs in the Rocky Mountains
Junior Ranger Programs in the West & Pacific
Junior Ranger Programs in the Pacific Northwest & Alaska
Junior Ranger Specialty Badges
Junior Ranger Program Online
Sometimes you can’t make it to a specific National Park site. There are some badges that can be earned online by downloading the packet or contacting the site by email/phone/mail. Once you complete the packet you can mail the packet to an address and the site will mail you back a badge and certificate. If this is available at the site it will be indicated with “**Online Available**”.
![]()
How to make a Junior Ranger Badge Display
Supplies:
- Large piece of felt
- 1/2″ dowel rod
- Gold paint
- Paint brush
- Hot glue gun/hot glue
- Sharpie
- Cricut Iron-on vinyl
- Cricut cutting machine (we used the Cricut Joy)
- Cricut EasyPress 2
- Superglue
- String
- Scissors
Directions:
- Cut fabric to your specific size. We cut ours to a 33″ x 24″ rectangle, then iron fabric smooth.
- Cut dowel rod to allow 1 inch on both sides of the fabric. We cut ours to 26″. (You may have to sand the ends of the dowel rod to make smooth). Paint dowel rod. Set aside to dry.
- Heat up hot glue gun.
- Once dowel rod is dry, roll fabric around dowel rod so the fabric folds over about 1 1/2″. Mark fabric line with sharpie.
- Remove dowel rod. Run a hot glue line above sharpie line about 1/4 of the way of the fabric. Fold fabric and press fabric on hot glue. Hold until glue is dry. Continue another 1/4 of the way of the fabric and repeat till fully done.
- Turn fabric over.
- Using the Cricut Joy App or Cricut Design Space we used ?? font to add Junior Ranger and cut the Iron on Vinyl with the Cricut Joy. Remember you’ll want to place your Iron on vinyl face down on the mat, and don’t forget to mirror your image!
- Place & measure the Iron on vinyl on the top of fabric. (Make sure not to put vinyl on the hot glue line.)
- Heat up Cricut EasyPress 2 & press on the Iron on vinyl. (Since we are using felt we heated up the Easy-Press to 280 degrees for 30 seconds) TIP: If you are using a different fabric check out my post on the correct temperatures and how long to heat up vinyl about FAQs about Cricut EasyPress 2 – Free Settings Printable.
- Layout Junior Ranger Badges where you want them. We put ours into the shape of an arrowhead. Once you like the layout pin badges to fabric.
- If you have patches place patches in desired location and use Cricut Easy-Press to apply. TIP: We use Badge Magic to help apply patches because sometimes the glue isn’t enough to stay on or the back of the patch doesn’t have any glue.
- Place dowel rod through the loop you created at the top of the fabric. Allow 1 inch on both sides of the fabric. Tie string to ends of the dowel rod. Cut excess string and super glue the knot to itself and the dowel rod so it doesn’t move when hanging.
- Place on wall for all to see!
Junior Ranger Badge Display
Materials
- Large piece of felt
- 1/2" dowel rod
- Gold paint
- Paint brush
- Hot glue gun/hot glue
- Sharpie
- Cricut Iron-on vinyl
- Cricut cutting machine (we used the Cricut Joy)
- Cricut Easy Press 2
- Superglue
- String
- Scissors
Instructions
- Cut fabric to your specific size. We cut ours to a 33" x 24" rectangle, then iron fabric smooth.
- Cut dowel rod to allow 1 inch on both sides of the fabric. We cut ours to 26". (You may have to sand the ends of the dowel rod to make smooth). Paint dowel rod. Set aside to dry.
- Heat up hot glue gun.
- Once dowel rod is dry, roll fabric around dowel rod so the fabric folds over about 1 1/2". Mark fabric line with sharpie.
- Remove dowel rod. Run a hot glue line above sharpie line about 1/4 of the way of the fabric. Fold fabric and press fabric on hot glue. Hold until glue is dry. Continue another 1/4 of the way of the fabric and repeat till fully done.
- Turn fabric over.
- Using the Cricut Joy App or Cricut Design Space we used ?? font to add Junior Ranger and cut the Iron on Vinyl with the Cricut Joy. Remember you'll want to place your Iron on vinyl face down on the mat, and don't forget to mirror your image!
- Place & measure the Iron on vinyl on the top of fabric. (Make sure not to put vinyl on the hot glue line.)
- Heat up Cricut EasyPress 2 & press on the Iron on vinyl. (Since we are using felt we heated up the Easy-Press to 280 degrees for 30 seconds) TIP: If you are using a different fabric check out my post on the correct temperatures and how long to heat up vinyl about FAQs about Cricut EasyPress 2 – Free Settings Printable.
- Layout Junior Ranger Badges where you want them. We put ours into the shape of an arrowhead. Once you like the layout pin badges to fabric.
- If you have patches place patches in desired location and use Cricut Easy-Press to apply. TIP: We use Badge Magic to help apply patches because sometimes the glue isn't enough to stay on or the back of the patch doesn't have any glue.
- Place dowel rod through the loop you created at the top of the fabric. Allow 1 inch on both sides of the fabric. Tie string to ends of the dowel rod. Cut excess string and super glue the knot to itself and the dowel rod so it doesn't move when hanging.
- Place on wall for all to see!
Recommended Products
As an Amazon Associate and member of other affiliate programs, I earn from qualifying purchases.


 This is me Destiny! I'm a content creator that covers DIY, Cricut, Travel, National Parks, Disney, Games and Family. I’m navigating life with my husband Mike, 2 kids and live in the suburbs of Maplewood, New Jersey.
Trackbacks/Pingbacks