


Travel has always been something I’ve enjoyed and look forward, and having a passport I wanted to make sure I kept it protected, so I got a Passport Holder and got crafty with my Cricut to make it extra special.

What is a passport Holder?
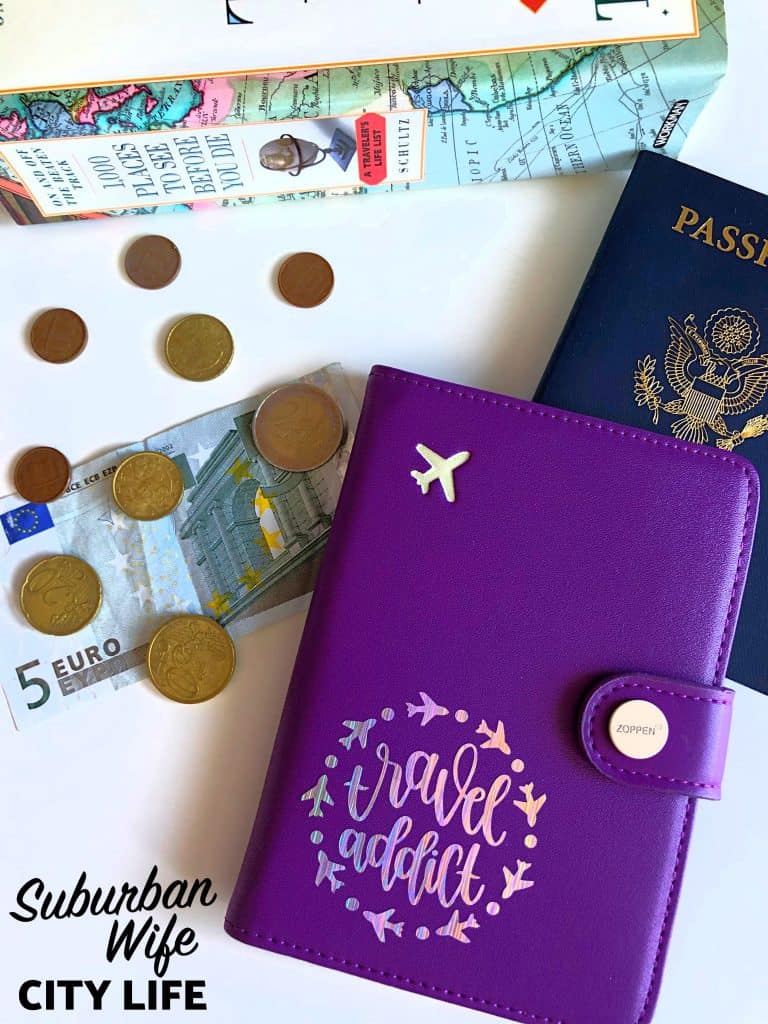
A passport holder is a great way to protect your passport and keep important items, like credit cards or IDs in one place while traveling. Why not just put it in your wallet? Well the passport is a strange size and too big for a normal wallet, so it’s nice to have it protected and easy to find in your bag. There are lots of different options, colors and designs out there to pick from, but I wanted to make one no one else would have.

How to DIY a passport holder
What I love is passport holders are usually a pretty sturdy leather or faux leather, so adding vinyl to them is a pretty easy option. I utilized the Cricut Designs and found this cute Travel Addict and knew I wanted that to be on my case.
Supplies:
Passport Holder (here’s the one I got, but there are tons of different colors)
Permanent Vinyl (I used a holographic)
Transfer Tape
Cricut (Joy, Explore Air or Maker)

Personalized Passport Holder
To cut the design you can use any Cricut machine.
Place the permanent vinyl faceup on the mat, load and cut!
After you weed it you’ll want to use transfer tape to put it on the passport holder
Travel Gift ideas
This makes a great gift for that travel fan/addict in your life. It also just makes keeping your passport a little easier to find. Of course if you’re looking for other gift ideas I recommend the scratch off maps. Not only is it a great way to make where you’ve been, but it gives you inspiration for future travels.
If you’re looking for other travel ideas, while not international check out these National Park posts: National Parks Passport, Ultimate Guide to Junior Ranger Programs.
 This is me Destiny! I'm a content creator that covers DIY, Cricut, Travel, National Parks, Disney, Games and Family. I’m navigating life with my husband Mike, 2 kids and live in the suburbs of Maplewood, New Jersey.