
When it comes to planning an event I try to keep what’s important in mind. For our schools fundraiser the theme was Masquerade and I thought it would be cute to make DIY Masquerade Archway.
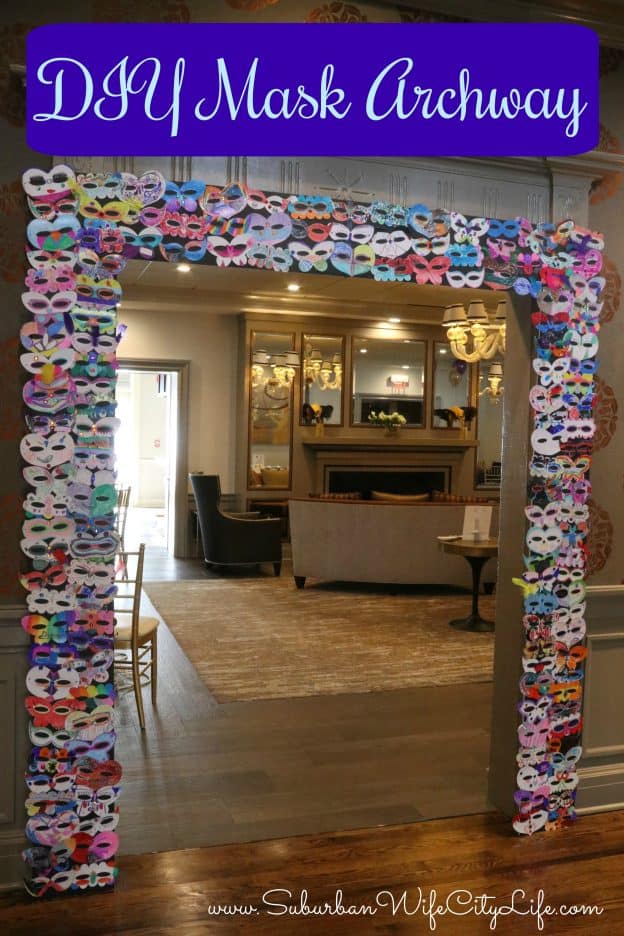 I wanted to masks to be a reminder of what the event was about, and thought it would be cute to have each child in the school decorate one. With 600+ kids I also needed to keep it on a budget. Thankfully the school snagged a decoration sponsorship from Oriental Trading that allowed them to purchase all the masks, some jewels and feathers to decorate.
School Fundraiser Decorating Masquerade
Once the supplies came in I coordinated with the Art teacher to have the kids make the masks. When he returned the completed masks to me I was blown away with how original, beautiful and creative each mask was. It was hard to tell a Kindergarten mask from a 5th grader mask.
How to make an archway
Making the archway was a lot easier than I thought it would be. The 1st thing you need to do is measure where you’ll be putting the archways. The archways I was making this for were 84 inches x 84 inches so I will use that as my example
Supplies Needed for a DIY archway
Foamcore (I went with black as I felt it looked best) 20×30
Electrical Tape
Hot Glue Gun & Glue
Ruler or T-ruler
Box cutter knife
Decorated masks
Plastic Tablecloths
Once you have all the supplies together it will probably take about an hour for each archway, depending on the size.
 Step 1: Cut the foam core in half getting 2 pieces at 10 inches across and 30 inches tall. I need 3 on each side of the archway and 2 for the center.
Step 2: Make brace pieces. These are small foam core squares that will help to maintain the sturdiness of the arch
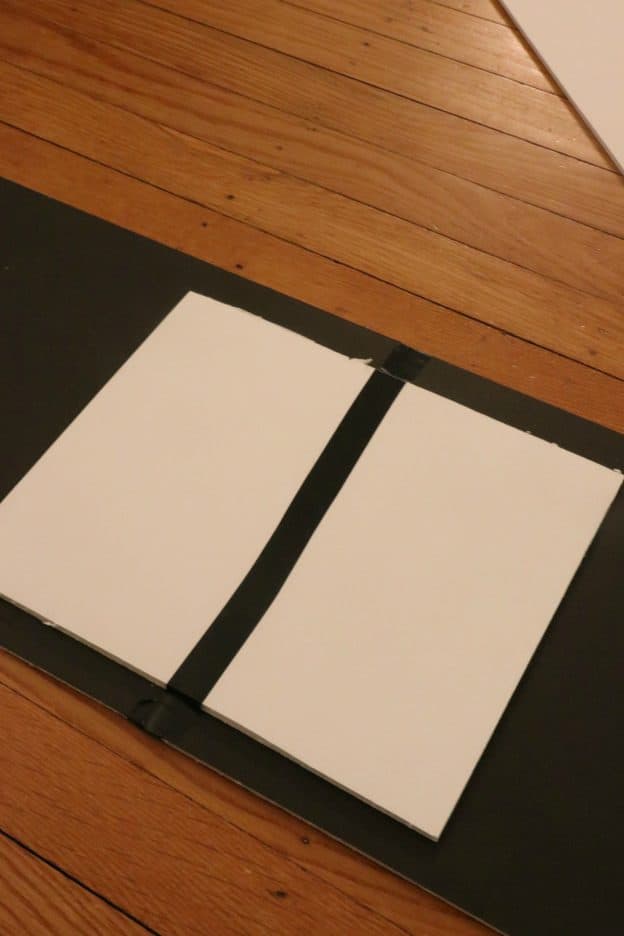 Step 3: Once you have all the pieces cut you’ll want to connect them. I used electrical tape to attach the 2 pieces together, then I flipped it over and hot glued the brace to the back, and added tape over it.
 Step 4: After you have these together it’s time to hot the masks on.
Step 5: If you are transporting the pieces I recommend you wait to put them together when you arrive to the venue.
Step 6: When you’ve arrived to the venue, don’t forget to bring your hot glue gun and electrical tape. So you can put together the archway.
 Step 7: To secure it to the wall I use 3M command strips. This way it can easily be put up and taken down.
 Step 8: Depending on the archway you may need to add a little more to the back. Our archway showed the back so I took 2 dollar store table cloths and add them to cover the back.
Mask Archway

Overall this archway is a great way to decorate and remind people that the event is about the children. Plus the materials are affordable, so a school or an organization on a budget could make some pretty special decorations. Yes we were lucky to have Oriental Trading as a decoration sponsor, but we made 3 archways and decorated class baskets and other items with the masks.
Have you ever been to a Masquerade party?
Make sure you check out my other post:
 DIY Masquerade Masks
 This is me Destiny! I'm a content creator that covers DIY, Cricut, Travel, National Parks, Disney, Games and Family. I’m navigating life with my husband Mike, 2 kids and live in the suburbs of Maplewood, New Jersey.
Trackbacks/Pingbacks